


.svg)
.svg)


Get Business Email
No domain name required
Build eCommerce Website
Explore Neo!

Online sales continue to grow year by year. By 2027, almost 23% of all retail sales will likely happen online - so if you’re exploring ecommerce business ideas for a small business, it’s time to leverage a web store.While it might sound challenging to build your eCommerce website, the good news is that with the right tools, it's easy for any small business to start selling online quickly. An eCommerce website builder can help you remotely upload your catalog, accept payment, and handle shipping hassle-free.
You can create an eCommerce website to help you sell products, book appointments, gather customer information, and more. The first step is to choose an eCommerce website builder that is perfect for your business and budget to make your online shop. You can even enjoy robust security and high levels of integrations and automation. Are you looking for a guide on how to set up your eCommerce website? Here are quick and easy steps to design your online store with the top 5 eCommerce platforms. Continue reading to learn more!
Quick and Easy Methods to Create an eCommerce Website
Creating your online shop using a website builder is among the quickest methods to grow your small business. Follow this step-by-step guide to create your eCommerce website swiftly.
1. Shopify

Shopify's website builder allows you to get started immediately if you want to create a website to sell goods or promote your brand. You will also get a three-day free trial to set up your eCommerce website. After that, you can continue developing your online store for just $1 for the first month. Beyond its website builder, Shopify offers additional features to support the expansion of your online or physical store because it is a commerce-focused platform, including a landing page, inventory management, AI tools, chatbot support, and more.
To create your eCommerce website on Shopify, follow these steps:
Step 1. Create Your Shopify Account
- Visit Shopify.com and select the "Start free trial" option located in the upper right corner or the center of the page.

- You will be asked to give details about your online store, including whether you are using an online store for the first time and where you want to sell your products. You can skip these options if you want.
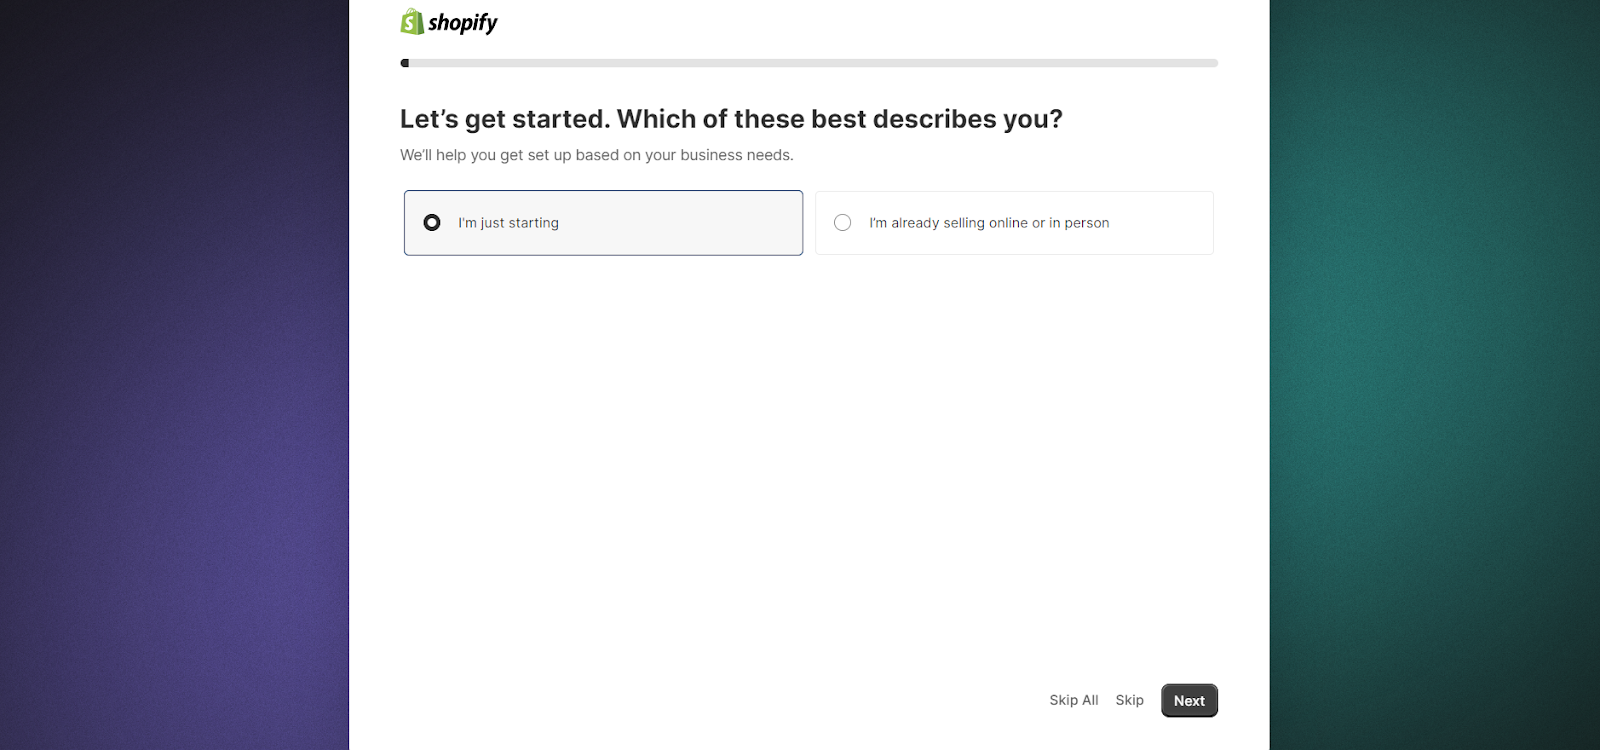
- You will be required to enter your country and sign into your Shopify account.
Step 2. Add basic site information
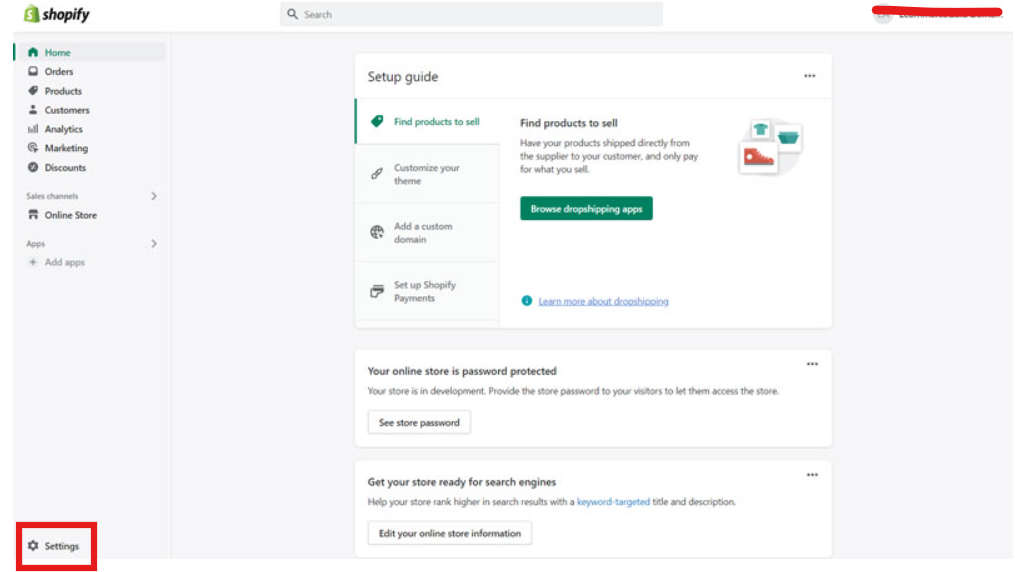
- As soon as you enter the store builder, a menu on the left displays links to different tools and features.
- Click Settings to change your website's name, time zone, and currency. Follow the setup instructions to add content.
Step 3: Choose your theme
- Click Customize Theme to change the theme of your website, or go straight to adding products to your store. Every theme includes Shopify's industry-best checkout. Cart Shopify gives your store a theme by default.
- If you’d like a different appearance, choose Online Store in the left sidebar to view and select free themes.
- Pick a well-liked free theme using the website builder.
- For premium themes with expert design, you can also visit the Theme Store.
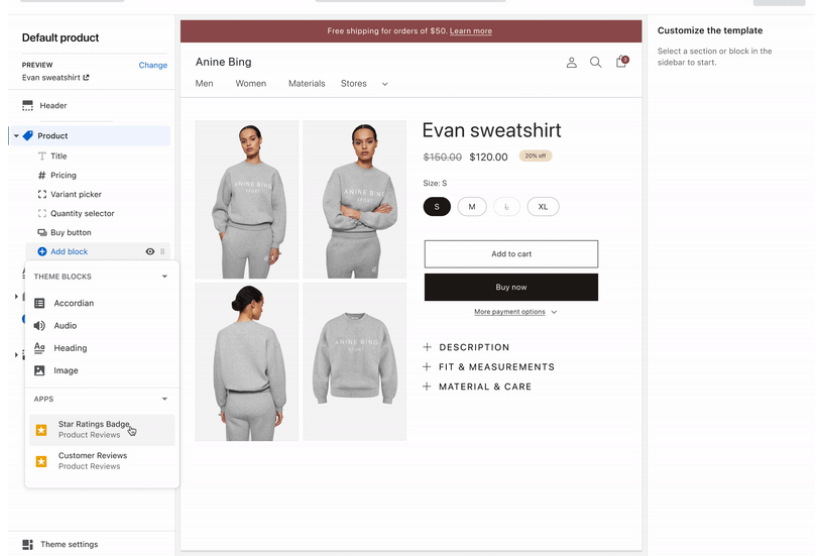
- After choosing a theme, click Customize to edit the page Sections or theme settings using the menu tools. You can also adjust the layout, logo, and other features of your website here.
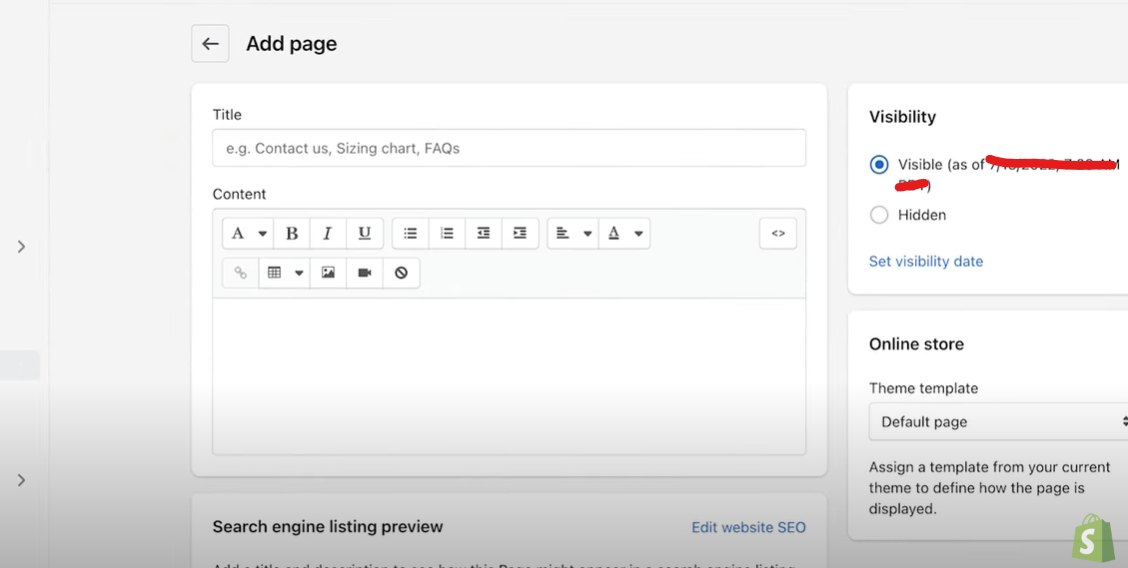
Step 4: Add pages and content
- You can add pages, content, and a navigation menu to your website by either going back to the setup guide or staying in the live builder screen.
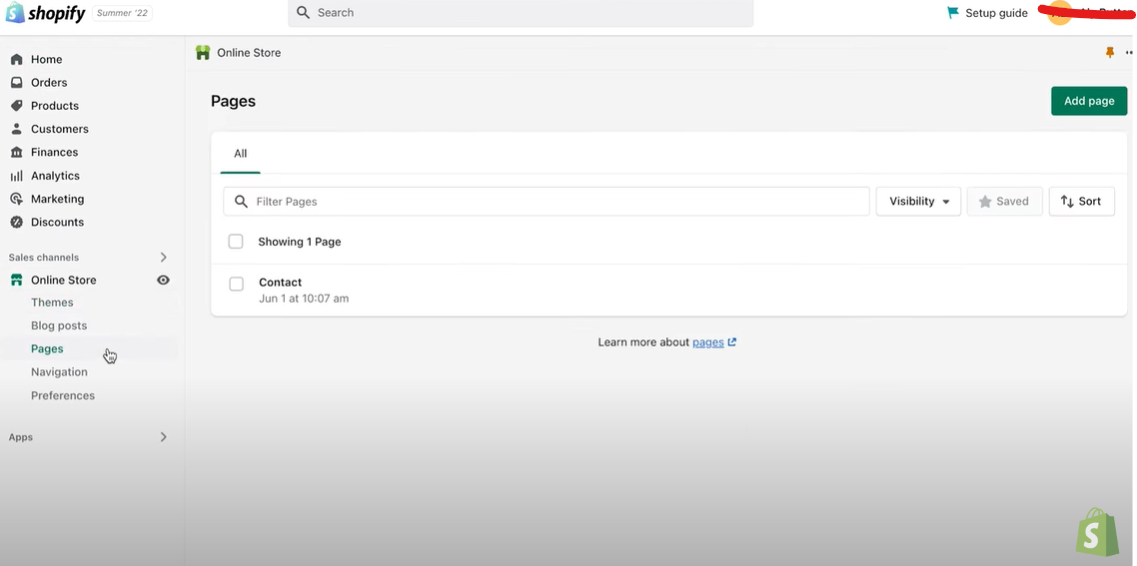
- Write content for the Contact and About Us pages. If you want to share more complex or personal information, consider writing a blog post.
Step 5: Add products
- Start entering your product after choosing the “All Products” option.
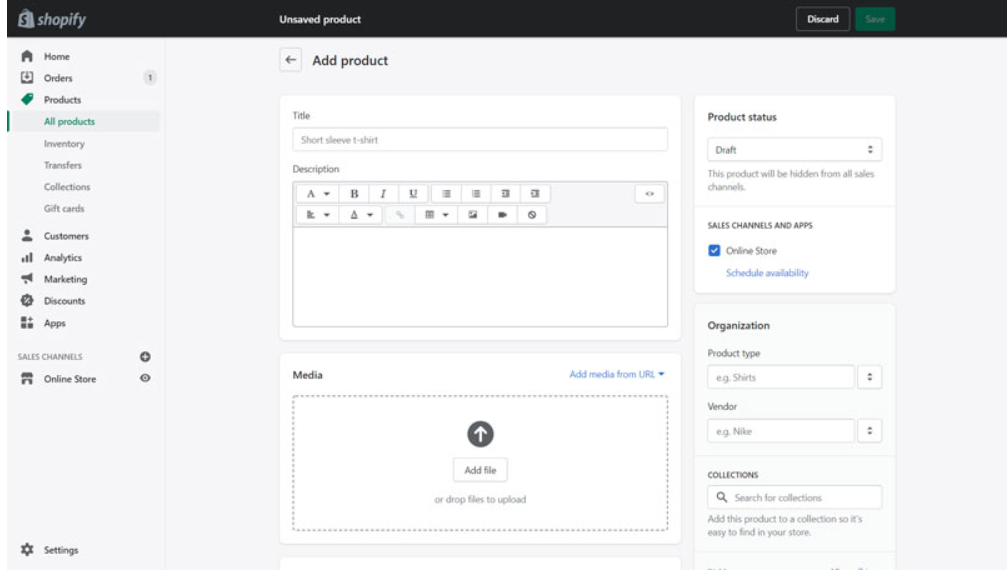
- Proceed as instructed to add titles, descriptions, prices, pictures, and videos. Create collections and categories to help you keep your products organized.
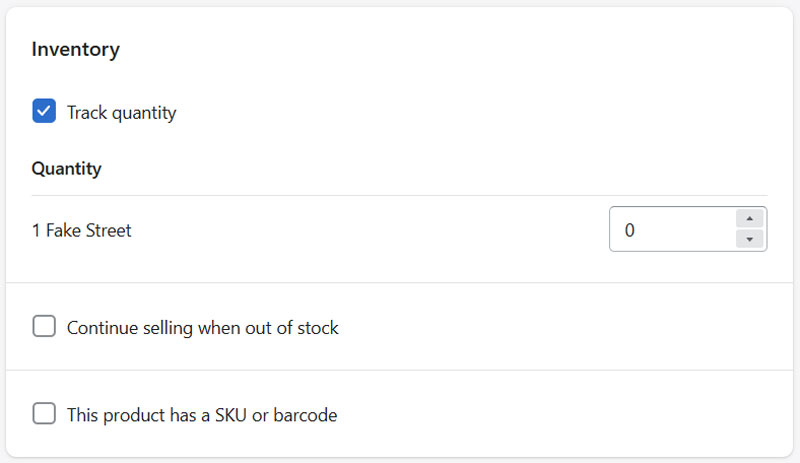
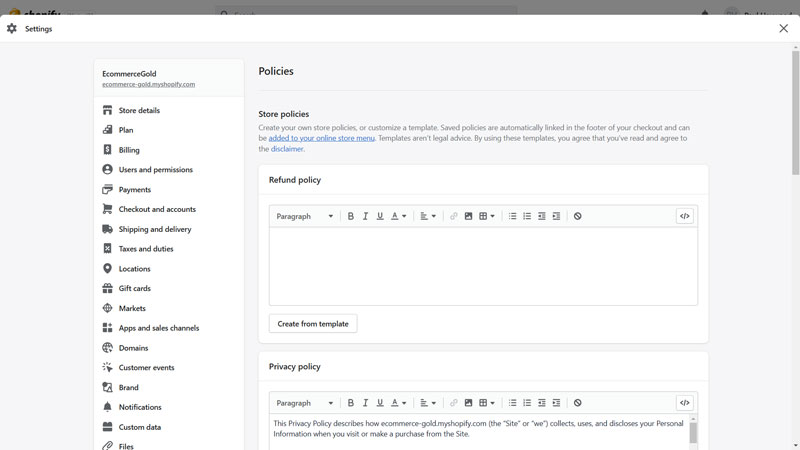
Step 6: Add Inventory and Policies
- Once your product catalog is ready, you can click on the Inventor option.
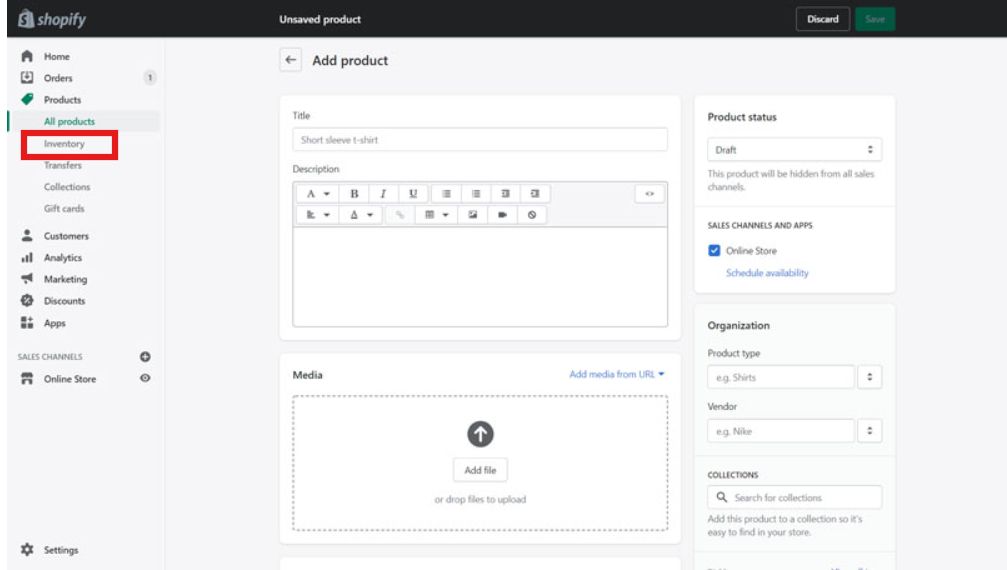
- Add the name of the product and check the necessary boxes.
- You can also create your store policies from the Settings menu, and Shopify can auto-generate some policies for you.
Step 7. Add a payment method
- Integrate a payment processor with your website so clients can checkout their products seamlessly.
- Go to Payments in the Settings or Setup guide and turn on PayPal, Shopify Payments, or another payment processor.
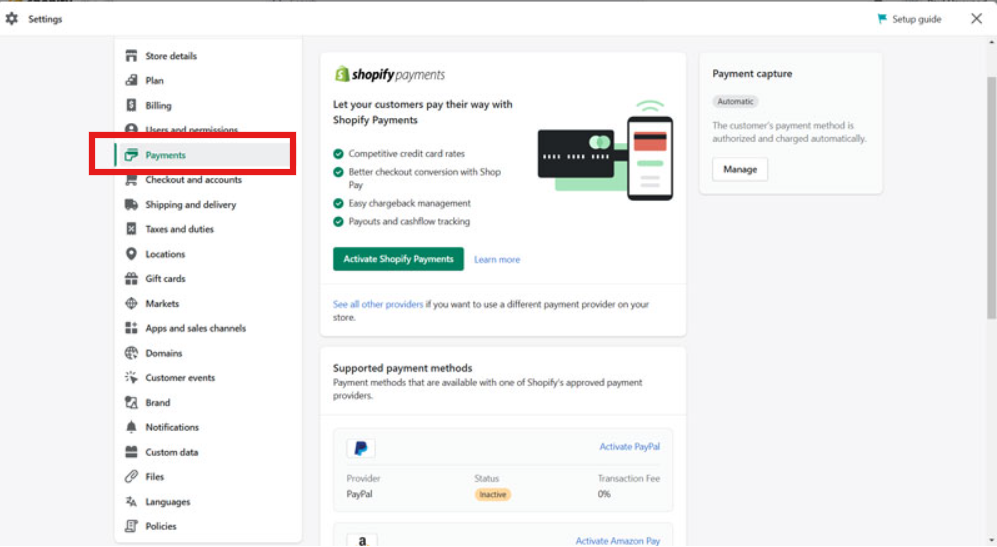
- You can also configure cart checkout options and allow the customers to add their contact information.

Step 8. Finalize your store—then continue building!
- After placing a test order to ensure functionality, select a launch plan for your website.
- As you gain more experience with the store builder, use the Settings menu to explore shipping, marketing, automated taxation, analytics, and other essential site functionalities.
2. Wix
With Wix, you can create a well-rounded eCommerce website to catapult your business. The platform offers Wix's no-code eCommerce website builder for creating your website, adding products, making a landing page to nurture your customer, configuring shipping, and publishing it. Once your website is all setup and prepared to take payments, you will need to upgrade to a premium plan. You can build an eCommerce website on Wix in the following manner:
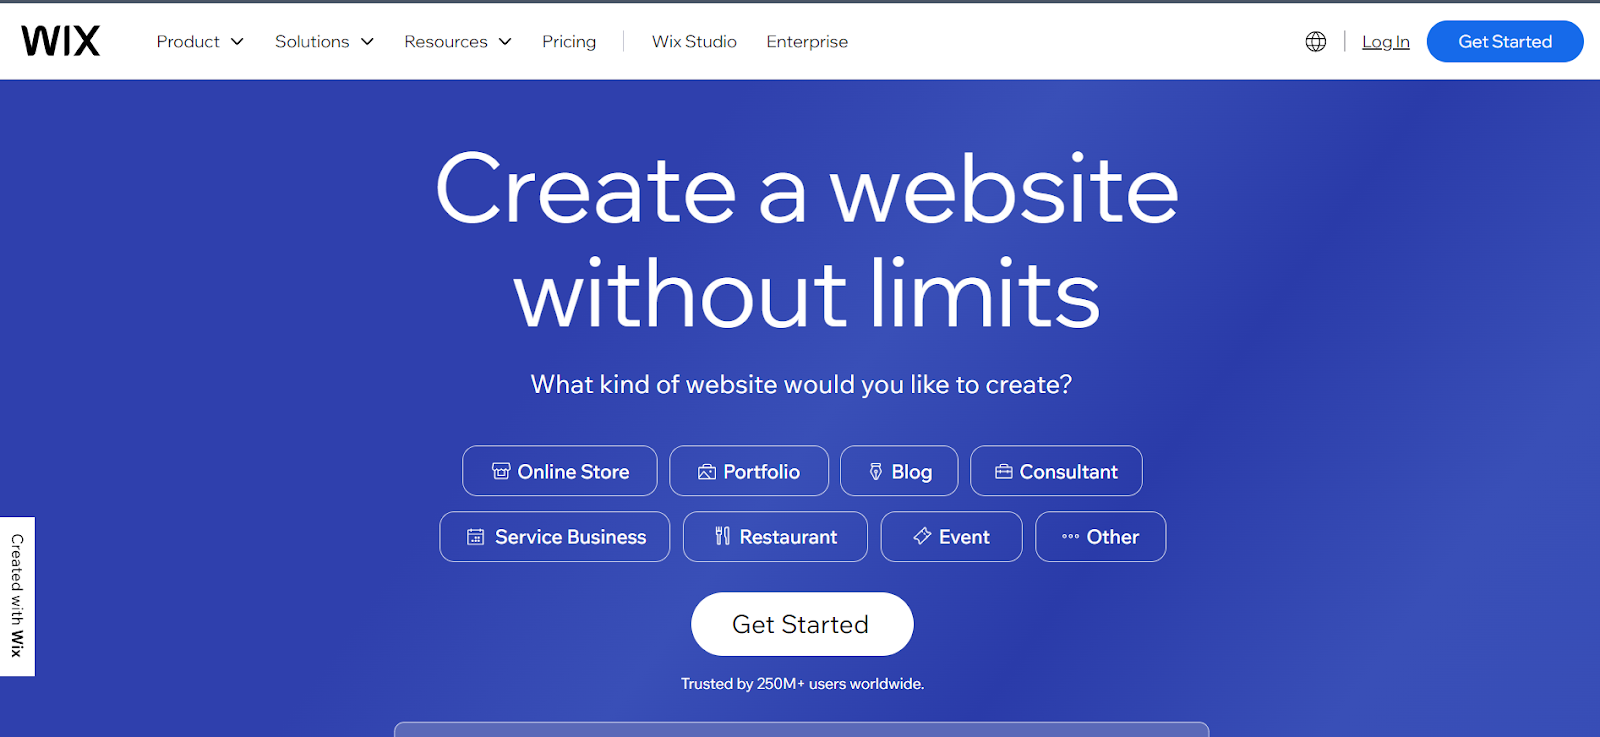
Step 1. Sign up for a Wix account
- To create an account, open the official website.
- Press the "Get Started" button.
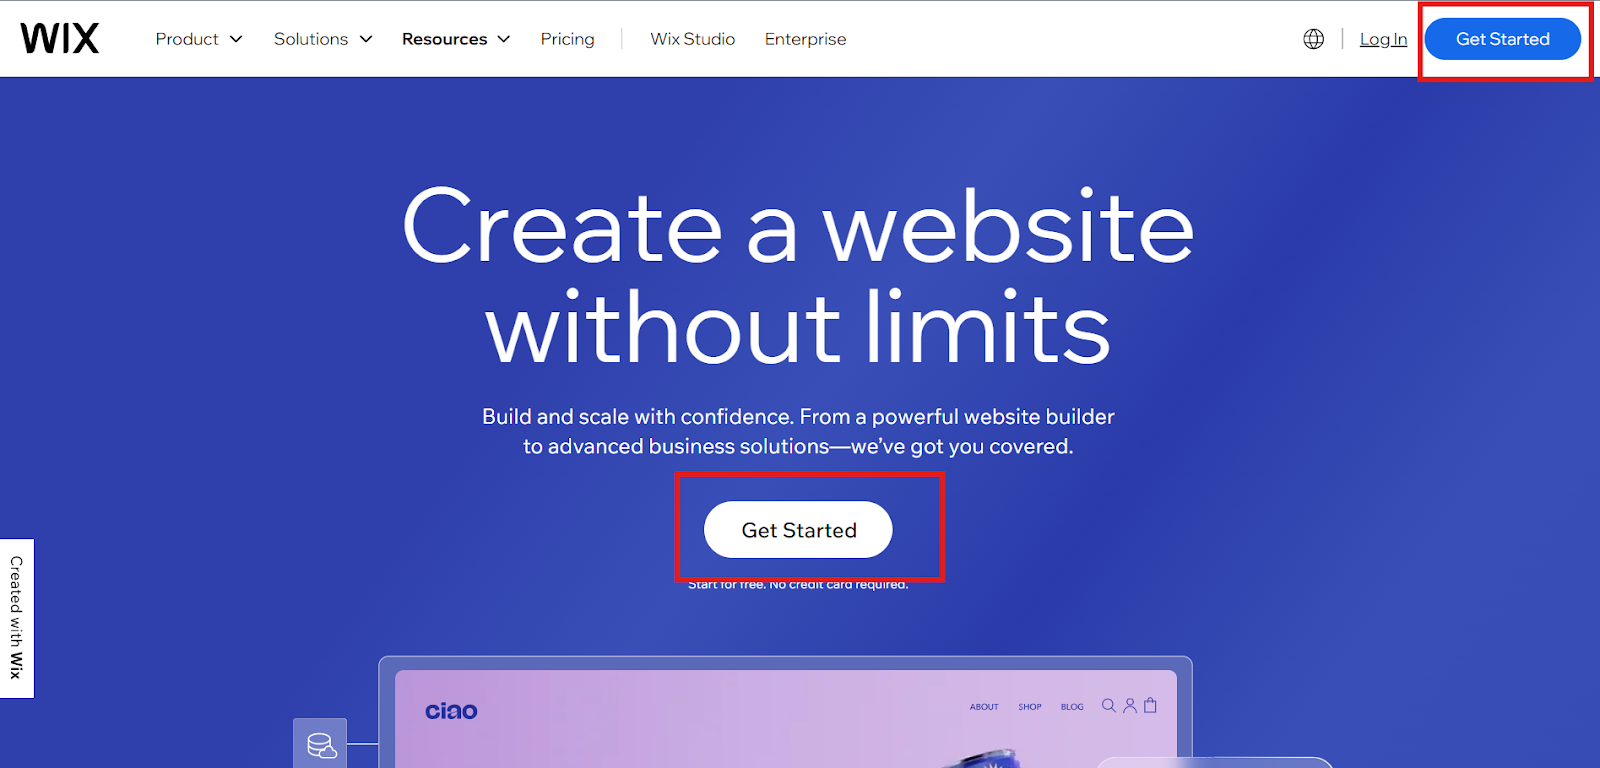
- To proceed, all you need is an email address and password.
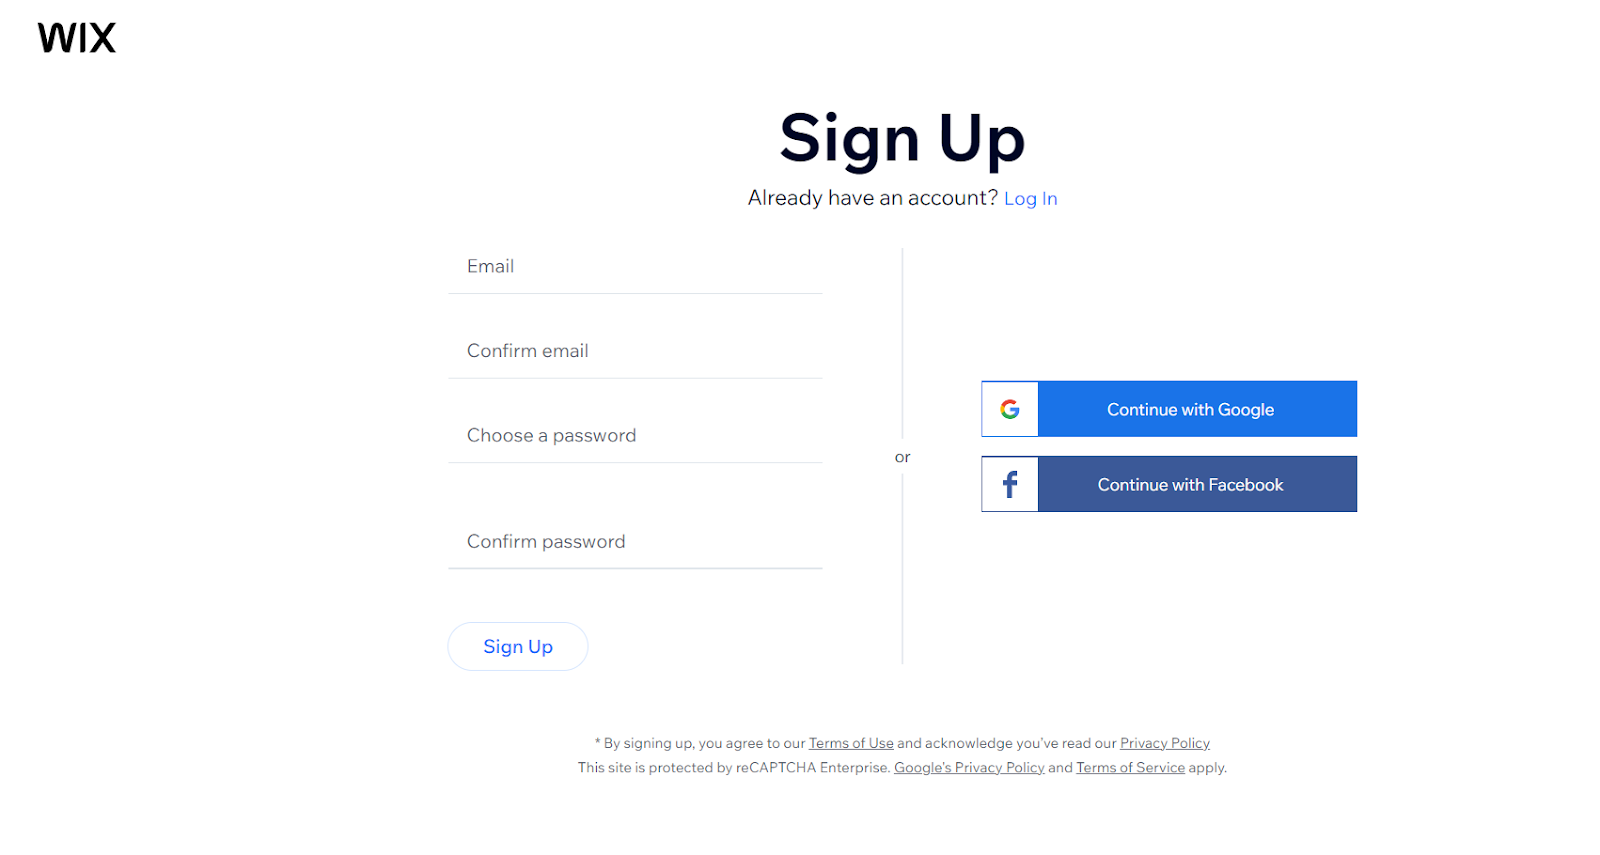
- Once the registration process is complete, you will be asked to choose your website type and name. You can add your business domain name or, if you have yet to, generate a domain name and purchase it.
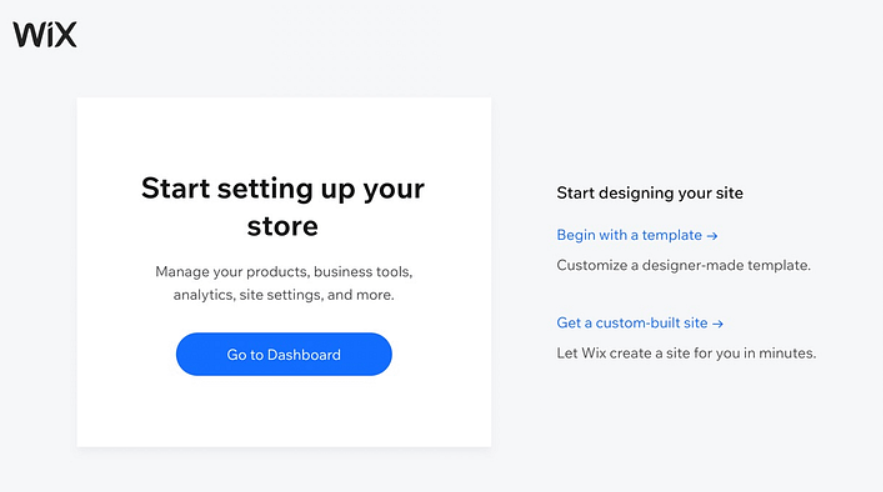
Step 2. Access your dashboard
- After completing the sign-up process, you will be prompted to give more details about your websites. Wix will auto-suggest tools and features based on that.
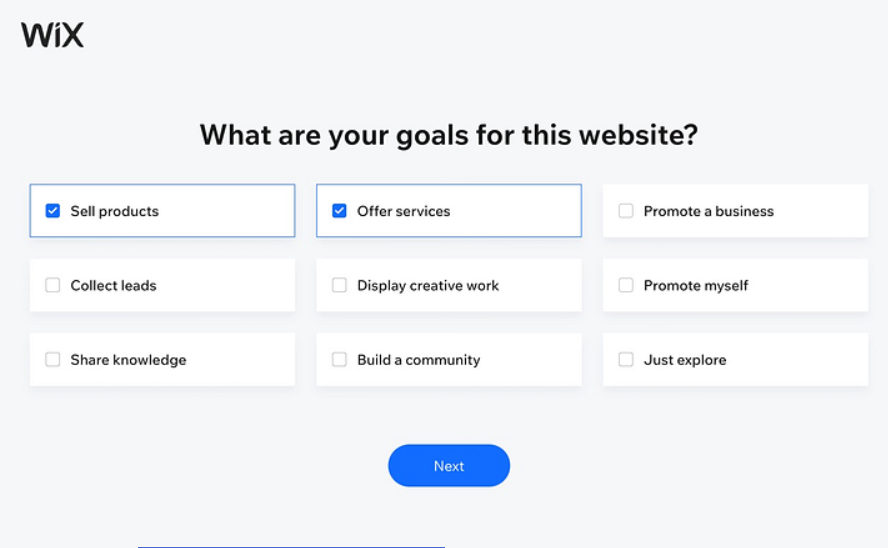
- Add the features you want from the list of all the features generated by Wix.
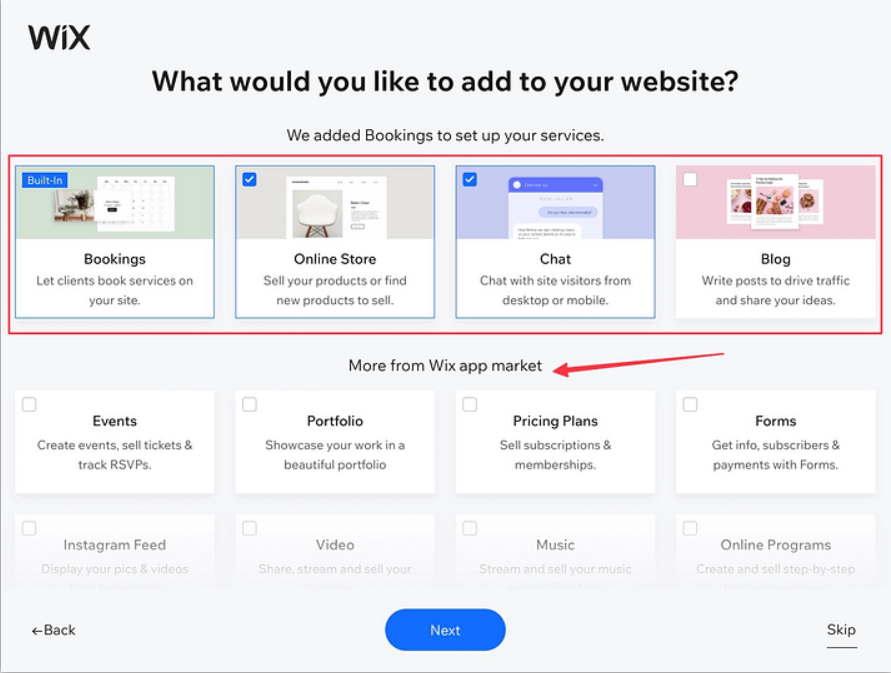
- You can then go to your dashboard and choose the Customize option.
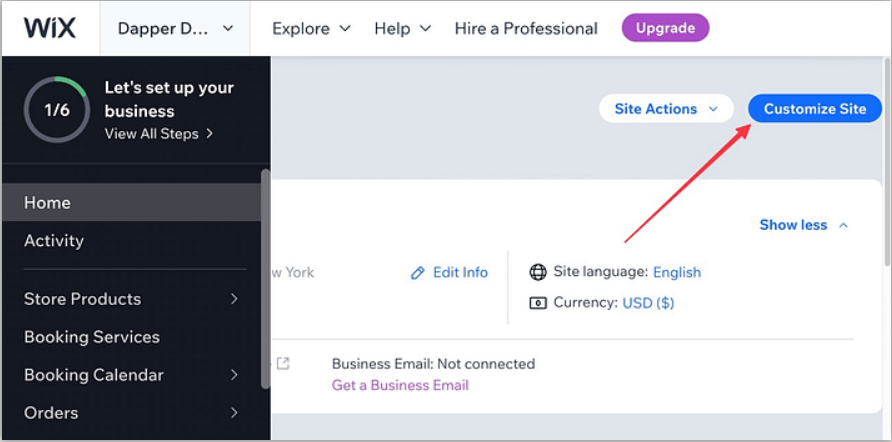
Step 3: Design your website
- Next, you are presented with two options to build your eCommerce website.
- Wix ADI: Using ADI will require you to respond to all of the questions on your eCommerce website. For instance, ADI will ask you to choose the kind of eCommerce website you want to build. Following this procedure, ADI will prompt you to select a template and a theme, such as an image, which then validates your company name. Then, in a matter of minutes, ADI uses artificial intelligence to design your website automatically.
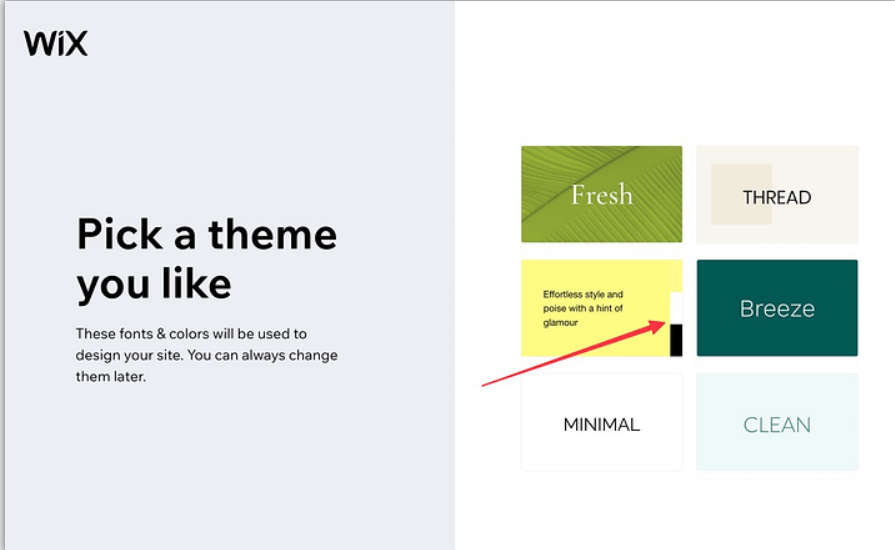
- Wix Editor: The Wix editor is also simple. However, the process may take more time compared to the ADI. With the Wix editor option, you begin by creating your website from scratch using a template.
- When you first click the Wix Editor button, a new page with numerous eCommerce templates will open.
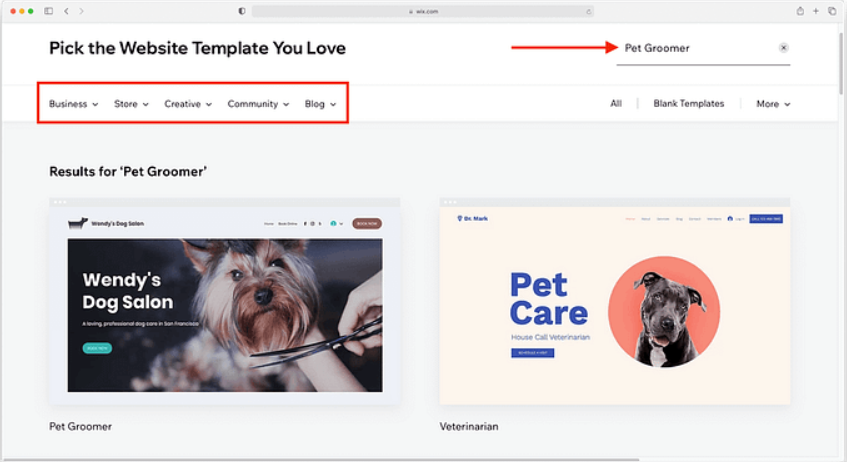
- Choose the website template that best suits your type of business. Next, select the Edit to Site option.
- You can alter any page and the layout of your website by making adjustments in accordance with your company's needs. To alter the website's image, click on it, select a different one, and then drag and drop another image to add.

- Select the option for mobile view. Make your whole website mobile-friendly as well.
Step 4. Set Up Your eCommerce Store
The next stage to build your eCommerce website will be to set up your functionality, including the components that will enable online sales of your product.
- Add Products In Your Wix Store: Navigate to the "Store Products" section on the left side of your dashboard. Next, select "New Product" in the upper right corner of the display. You can provide the product's name, write a description, determine its price, add it to the collection of top-selling products, and include product images and videos.

Source
- Set Shipping & Delivery Option: You can control your shipping rules from the dashboard. Also, confirm which areas you ship to and how the rates are calculated.
- Set Payment Methods: You also have to determine which payment methods are accepted, which is simple to accomplish due to Wix's integrated payment gateway.

Step 5. Connect to Your Domain Name
- Select "Domain" from the "Settings" menu located on the left side of your dashboard.
- There are two options available to you here: adding your existing domain name or purchasing a new one.
Step 6. Publish Your Free eCommerce Website
Although you can publish your website using a free plan, it will not have your custom URL and won't have any eCommerce features, even if you don't have a payment plan. Thus, you need to be using the premium Wix plan. Complete your membership plan before continuing.
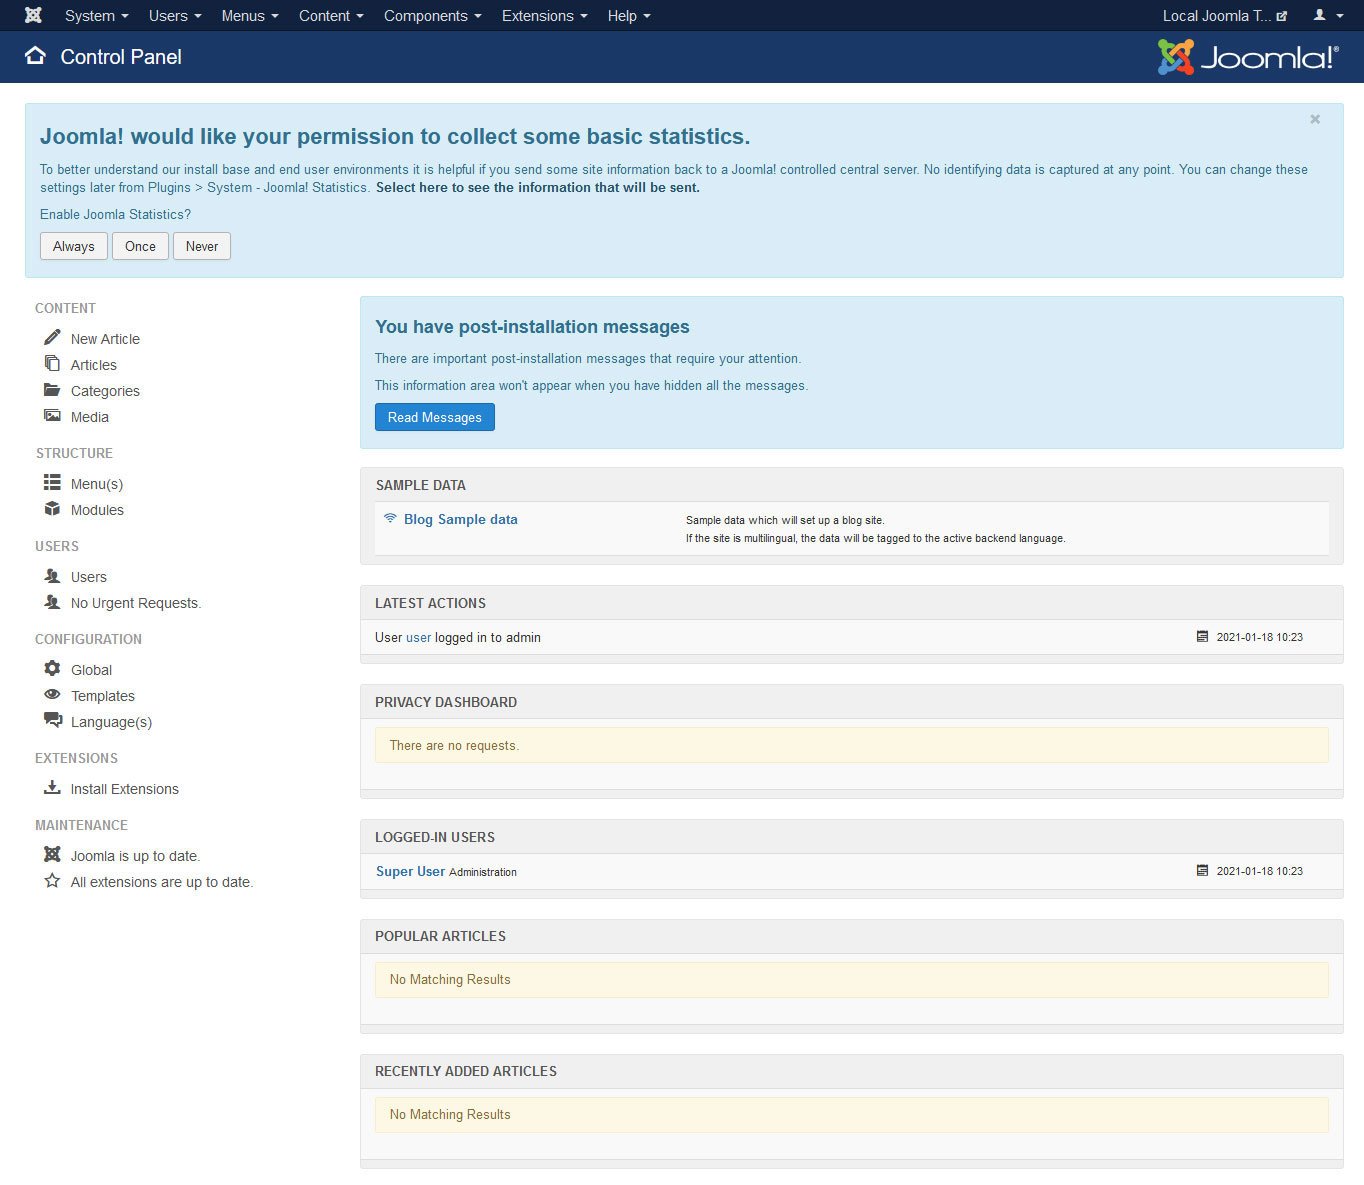
3. Joomla
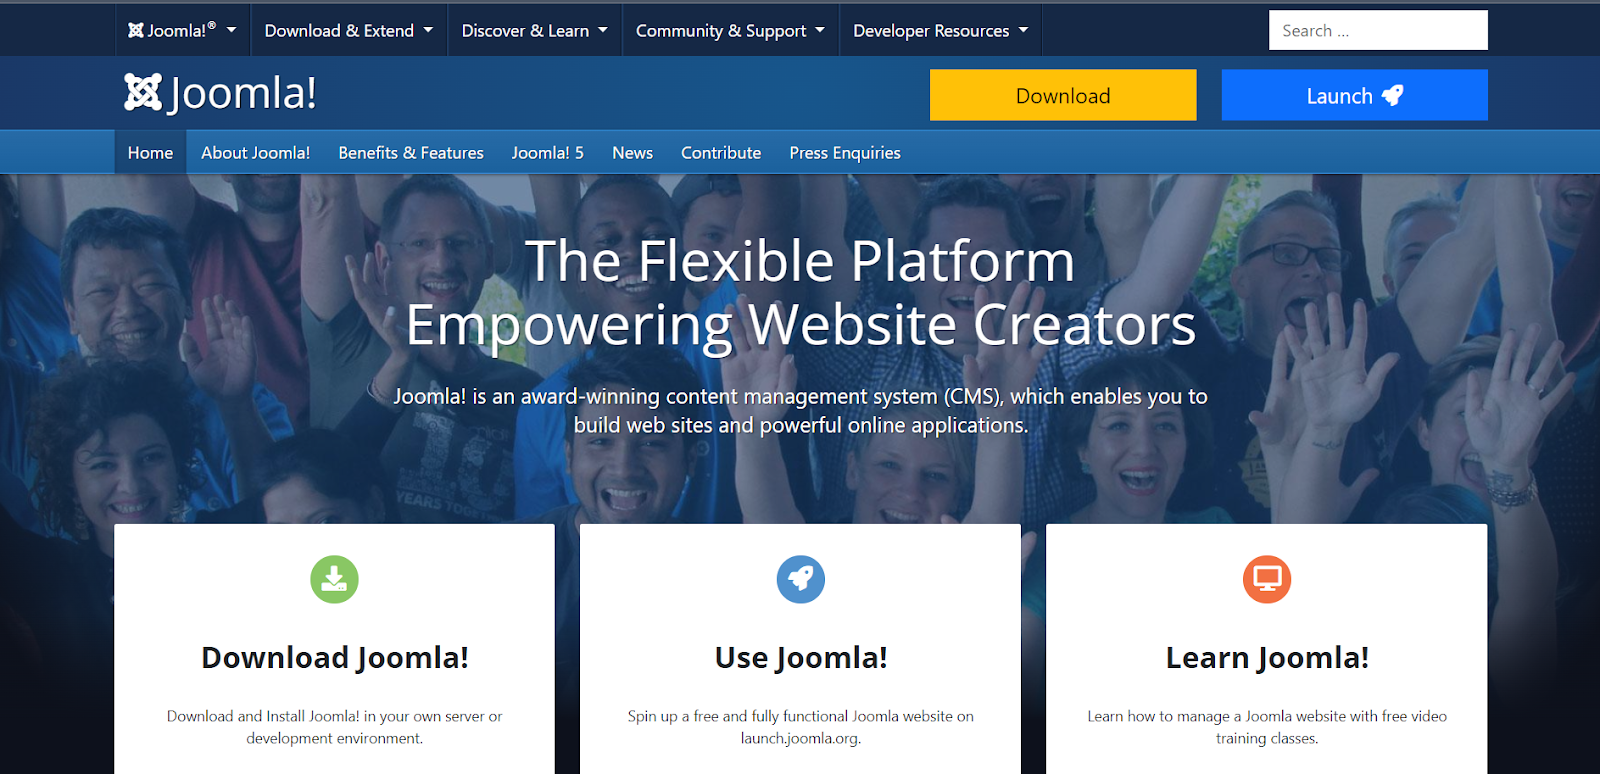
When starting an online business, Joomla for eCommerce is a great option. It offers a comprehensive package with features like adaptability and ease of use that can help you get started. As long as you take care of the website hosting and domain, it is easy to build an eCommerce website on Joomla. You can even use simple website templates and extensions to simplify the process further.
Step 1. Hosting and domain
- Make sure your hosting environment is appropriate before installing and configuring your Joomla eCommerce website. For this purpose, you won't need very powerful hardware. However, it is advised to use hosting from an established provider, such as BlueHost or Hositnger, so that your store will function steadily and reliably no matter how many customers visit it.
- A domain is often included in hosting packages, but you can purchase one separately if it isn't. A memorable and catchy web address is a good idea if you want your Joomla web store to succeed.
Step 2. Install Joomla
- Once the hardware for your Joomla eCommerce store has been sorted out, set up the content management system on the server. You don't need to select a particular edition. It's easy to create Joomla websites—just choose the basic version.
- You can either add the Joomla extension to your web host directly or manually. You will also need to configure the MySQL database, which is a fairly simple process.
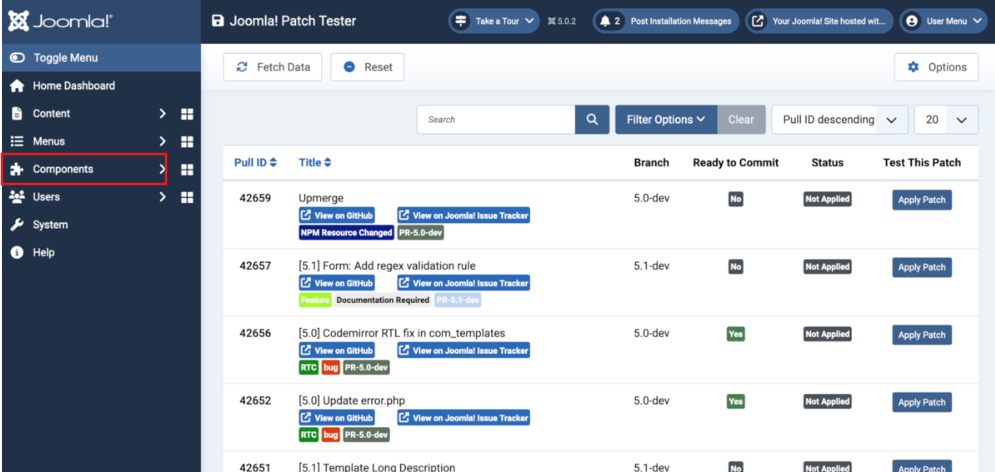
Step 3. Select and install the store extension
Joomla should then be converted to a web store CMS. Expand the system with eCommerce features and functionalities by using a Joomla extension. Among the most widely used extensions are VirtueMart, J2Store, and HikaShop. For example, if we choose the VirtueMart extension. Whichever option you choose, the store extension installs in the following ways:
- Open the backend of Joomla.
- On the left, select "System."
- Click "Install" and choose "Extensions."
- In case you have already downloaded the Joomla web shop plugin package files, indicate their location.
- As an alternative, you can search for the required extension by going to the "Install from Web" tab.

- After selecting the relevant search result, click "Install."
Step 4. Design your Joomla web store
- The essential features are added by a store plugin, but you'll still need to handle your web store's design. You can use a Joomla template or create your own web store design.
- When selecting a template, two things must be taken into account. First, the design template needs to work with the version of Joomla you are using. Second, the store extension and the template need to work together.

Step 5. Create product categories for the eCommerce website
- Access your Joomla control panel.
- Establish appropriate product categories when you set up an eCommerce website to best arrange your products. It's a good idea to think about which categories will work best for your project. After you've developed a concept for categorizing your products, take the following steps:
- In the Joomla backend, select 'Components' from the menu on the left.
- After installing the extension, the VirtueMart menu needs to be visible. After opening it, select 'Product category'.
- Select the 'New' option to add a new category. Now, change the parameters for every category. In the first tab, enter crucial data like the category name, an alias that is search engine friendly, and metadata. After that, you can give your category a description.
- You can now set up the category's appearance and structure in the "VirtueMart Category View Settings" tab.
- Lastly, use the "Images" tab to add one or more images to the product category.
- Choose the preferred photo by swiping down and clicking "Upload file."
- Click "Save" in the top menu bar to begin uploading.
- The picture is chosen for you automatically, and you can specify all the details of the image, including the file name, alt text, and description:
- After entering all the data, select "Save and close" to set up the category.
Step 6. Adding products
You can add products to the categories you set up in your Joomla eCommerce store. These are the procedures to add a new product:
- Click "Components" from the left-side menu sidebar.
- Choose "VirtueMart."
- Locate "Products."
- Select "New."

- Individual products have many settings available. In the first tab, enter all pertinent product data, such as the product name, manufacturer, and ISBN. You can also set the price.
- To make the product visible, select a category you built under "Categories" and make sure "Published" is checked.
Step 7. Publish your Joomla eCommerce store
- VirtueMart store can be added as a single page in any menu options. You can do the following to incorporate the store into the main menu:
- Select "Menus" from the menu on the left.
- Choose "Main Menu."
- Select "New."
- Put in a title, like "Store."
- "Select" the "Menu Item Type" category arrangement.
- On "VirtueMart" and "Category Layout," click.
- Click "Save."
Step 8. Add payment and shipping options
To add your payment and shipping details, follow these steps:
- On the left, choose the "Components" category.
- Open the menu named "VirtueMart."
- Select "Payment Method" or "Shipping Method."
- Use "New" to add a new entry and add the details.

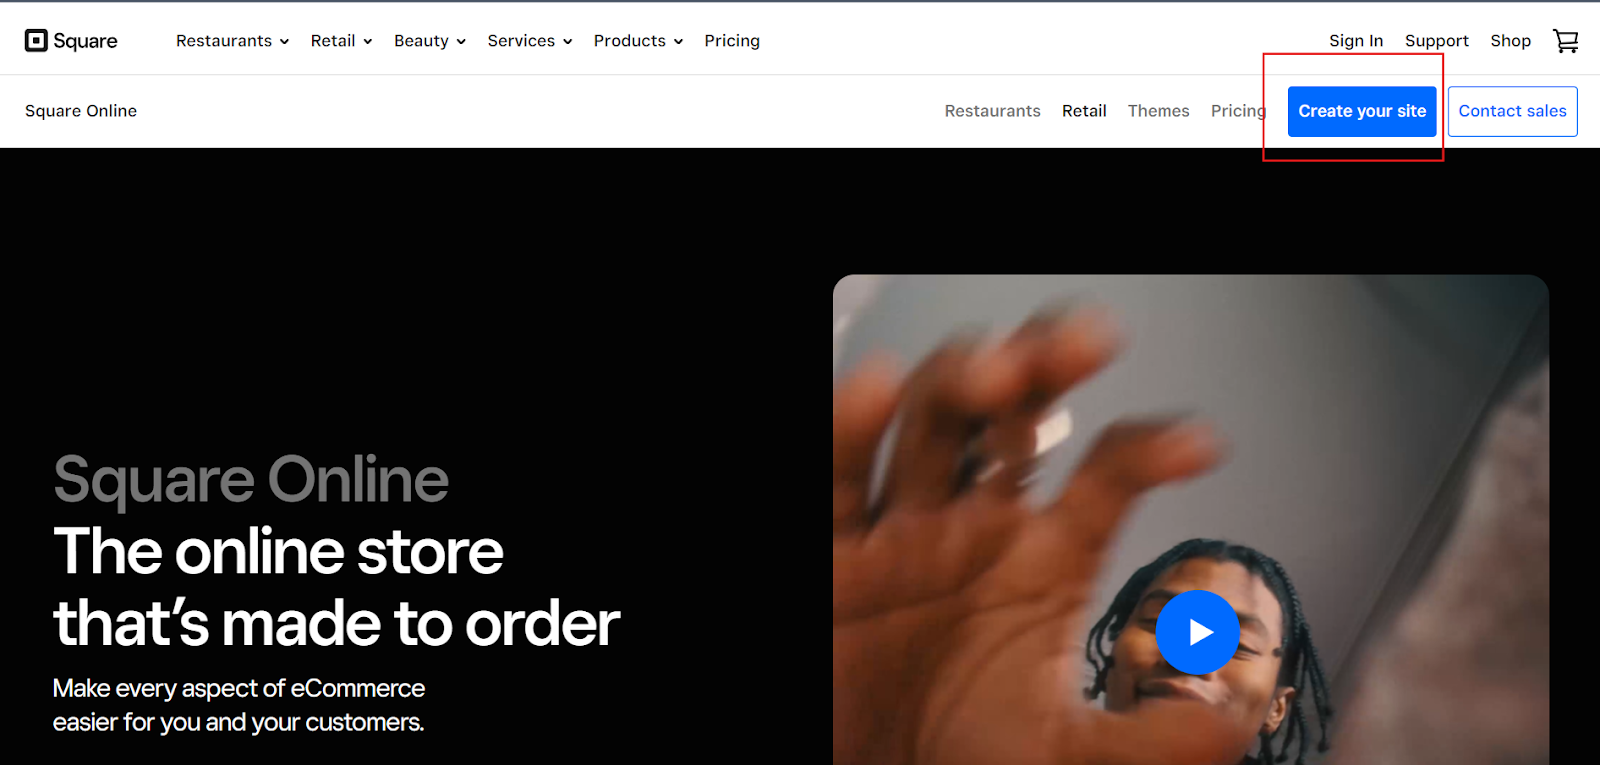
4. Square Online

Square Online, which lets users build websites with drag-and-drop functionality, is one of the best online platforms for creating an eCommerce website. It stands out from other website builders due to its simple interface, dynamic integration options, and powerful features. Let's now examine how to use this platform as your store builder and create the best shopping websites. And the best part? You can build your eCommerce website for free with Square Online!
Here are the steps to get started:
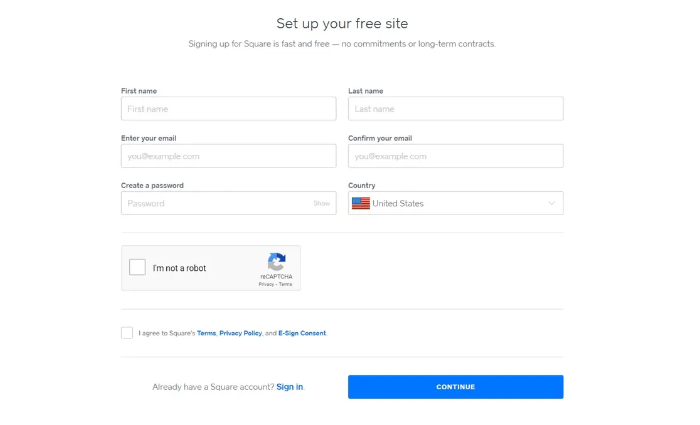
Step 1. Account Creation
- Visit Square Online’s Online Store home page and select the “Create Your Website” option.
- To finish the sign-up process, enter your email address.
- Once you are done signing up, you will be prompted to choose your website goal. Click the applicable options.
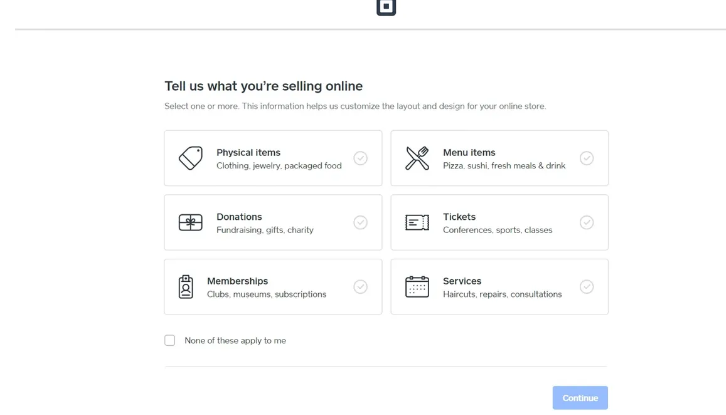
- Square Online will automatically suggest features that will best suit your site.
Step 2. Layout Selection
- After that, you'll be taken to your dashboard, where you should spend the majority of your time. You can manage your orders, plan your marketing, and adjust a few other settings here. Once you begin selling, this is where your sales number will appear as well.

- After selecting "Design your website," you can pick the options you want your commercial website to have and discard the rest.
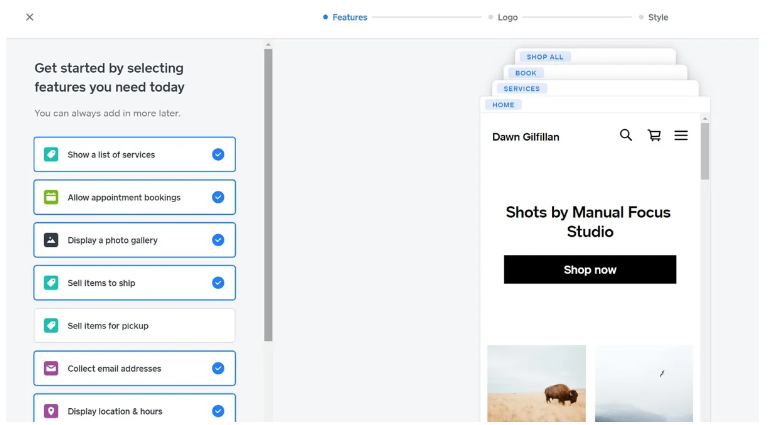
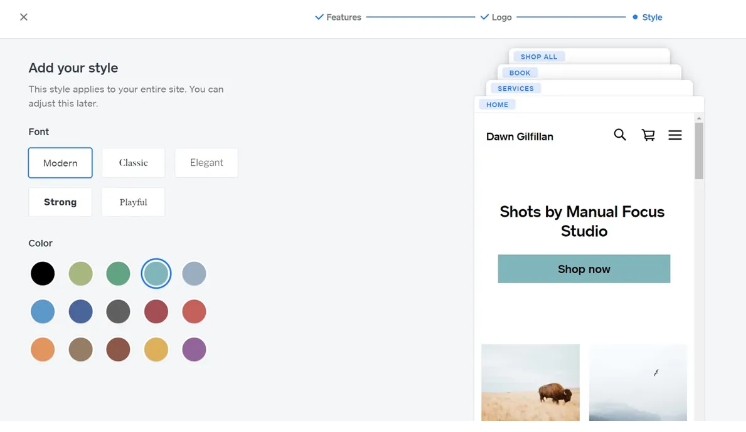
- Then, you can choose the style and theme of your online store.
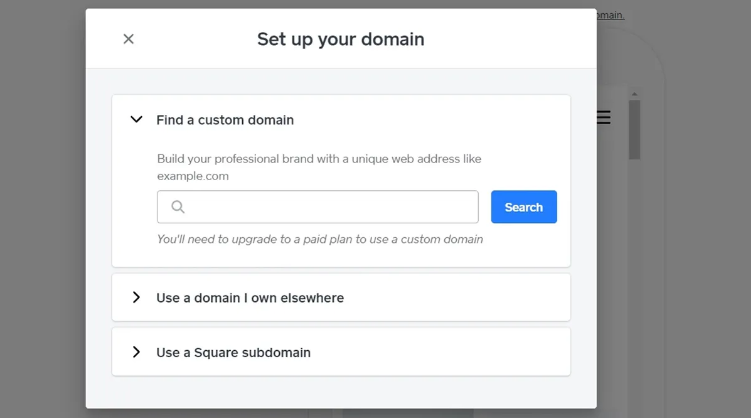
Step 3. Add your domain
- Square Online will ask you to create your online store’s URL. For this, you have to add your domain name.
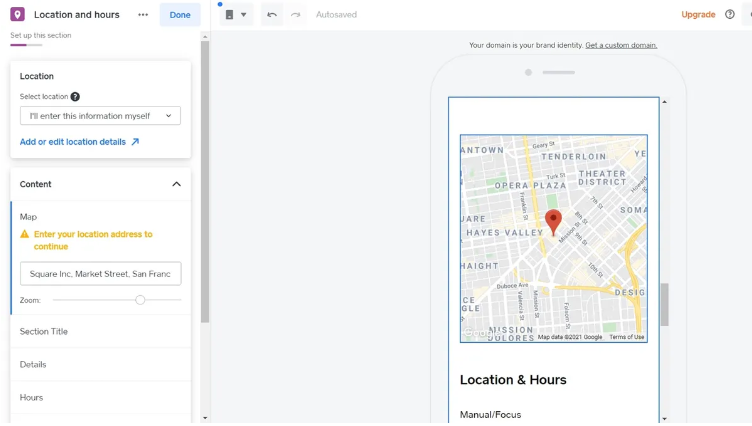
Step 4. Home Page Designing
- You can easily customize your store’s home page. In this step, you can add your store’s physical location, opening hours, and store and product information.
Step 5. Adding Products
- This is the main section where you will enter all of your product details. You can sell a variety of items, including digital, physical, and service.
- Select the “Add an Item to Sell” option.

- First, choose your product type rate, and be sure to include as much information as you can. Include a description, photos, the shipping weight, and other details.

Step 6. Shipping
- Shipping rules enable you to charge different shipping rates according to the country or continent.

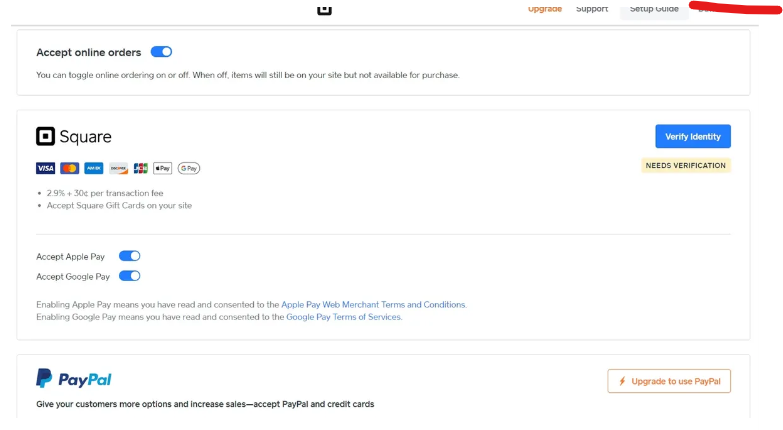
Step 7. Payment
- Paypal, Square, and Stripe are all integrated with Square Online.
- You must have an account with the specific payment method after logging in to connect with it. Well-known online retailers ensure that their websites provide the most payment gateway options possible.
- You can even automate your taxation process based on your location and local laws.
Step 8. Launch your store
- Once you’ve configured every detail of your store, you must press the "Publish" button to take ownership of your online store.
5. Neo One-Page Website
Neo is the best option if you are looking for an email-integrated solution and a simple website option for your small eCommerce business. It provides a complimentary one-page website with all its plans for a concise but impactful overview of your products or services, combining elegance and efficiency. It even offers great email marketing tools with email blast options, lead segmentation into different contact groups, and read receipts options.

Here's how to create a website using Neo:
Step 1. Visit the Neo AI Website Builder, and click on Try it yourself for free.
Step 2. Enter your industry.
Step 3. Describe the type of landing page you want.
Step 4. Click on Generate Site.
You select the one from a range of templates generated, and continue to edit to make it personalized. Add your business logo, visuals, offers, and embed the form to collect lead information. That’s it! Once you click on Publish, connect your domain or register a new one for free with Neo, and choose a Neo plan. You can now make it live.
All types of eCommerce businesses, whether retail or restaurant, can you use the AI-powered website builder to launch their website.
Final Thoughts
An eCommerce website indicates your online brand identity. It is a powerful tool that all businesses should leverage to ensure maximum profitability and opportunities. Moreover, with so many tools and platforms, building your eCommerce website is very easy.
You must design it so that consumers may interact with your brand more easily. Also, remember that getting everything correct the first time is not probable. Continue to gain knowledge from your experiences, be willing to try new things, and modify as required. So, are you ready to set up your eCommerce website? Pick the best option, Neo or Shopify, and take your business to new heights!
Frequently Asked Questions (FAQs)
Q1. Can I create an online store by myself?
Indeed, creating an eCommerce website by yourself is quite simple. You must take the following steps:
- Invest in a unique domain name for your online store.
- Select an eCommerce provider.
- Select a theme for your storefront.
- Make the theme unique to your business.
- Add products for sale.
- After setting up payment options, you may begin selling.
Q2. How much investment is needed to develop an eCommerce site?
When building an e-commerce website, you must pay for a domain name, SSL certificate, eCommerce hosting, payment processing integrations, store themes and designs, and any additional third-party tools you use. These factors will decide the final cost.
Q3. Are eCommerce website builders secure?
When it comes to maintaining the security of their sites, eCommerce website builders typically lead the way because they provide modern technology. They achieve this by employing the latest innovations, including encryption and anti-malware protection, to safeguard their clients' websites.
Get Business Email
No domain name required
Build eCommerce Website
Explore Neo!