


.svg)
.svg)


Get Business Email
No domain name required

In today’s world, communication through email is very common and requires proper management. One of the best strategies for achieving this is by using auto-forward email from Gmail. These features ensure you do not miss any important messages, even using multiple email accounts.
Whether you need to save emails in a folder, forward work emails to your account, or ensure that some emails are seen by your coworkers, Gmail's auto-forwarding can be truly helpful.
Here, we will explain how to configure email forwarding and email redirect Gmail with simple, easy-to-follow steps. From the basic settings to the most complex ones, you’ll learn how to enhance the way you manage your emails without much effort.
By the end of this blog, you will have a fully integrated and efficient email system that adds convenience to your work life. Without further ado, let’s explore how you can leverage this helpful Gmail auto-forward tool.
Benefits of Auto Forward or Redirect Emails from Gmail
Numerous benefits are associated with auto-forwarding emails in Gmail. These benefits improve the convenience of your email usage and guarantee that no critical emails will slip past you.
- Centralized Email Management: Set up Gmail auto forward so that all messages are delivered to one account, saving time when opening several mailboxes.
- Backup Important Emails: By forwarding emails to another address, you can create backups to preserve important data.
- Improved Productivity: Ensure that important messages are delivered to you or your team on time, improving the flow and rate of responses.
- Seamless Transition: Easily switch to another email address while having your contacts receive copies of your emails.
- Enhanced Organization: Using filters to subdivide and forward emails according to specific criteria makes email management easier.
How to Forward an Email Using Gmail?
Two options for forwarding an email are manual forwarding and automatic forwarding. This section will explain both approaches. Though the following steps are performed using a computer interface, the procedure is almost identical when using the Gmail mobile application.
Manually Forwarding an Email to Your Gmail
Here’s a step-by-step guide to forwarding an email manually in Gmail.
Step 1: Log into Your Gmail Account

First, open Gmail and log into your work or personal account using your username and password. This will take you to the main Gmail home page, where you can access your emails.
Step 2: Navigate to the Inbox
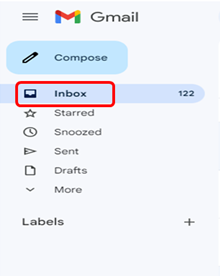
After signing in, find the left-hand menu and click on the button labeled ‘Inbox.’ This will display all the emails you received in the main window.
Step 3: Open the Email Message
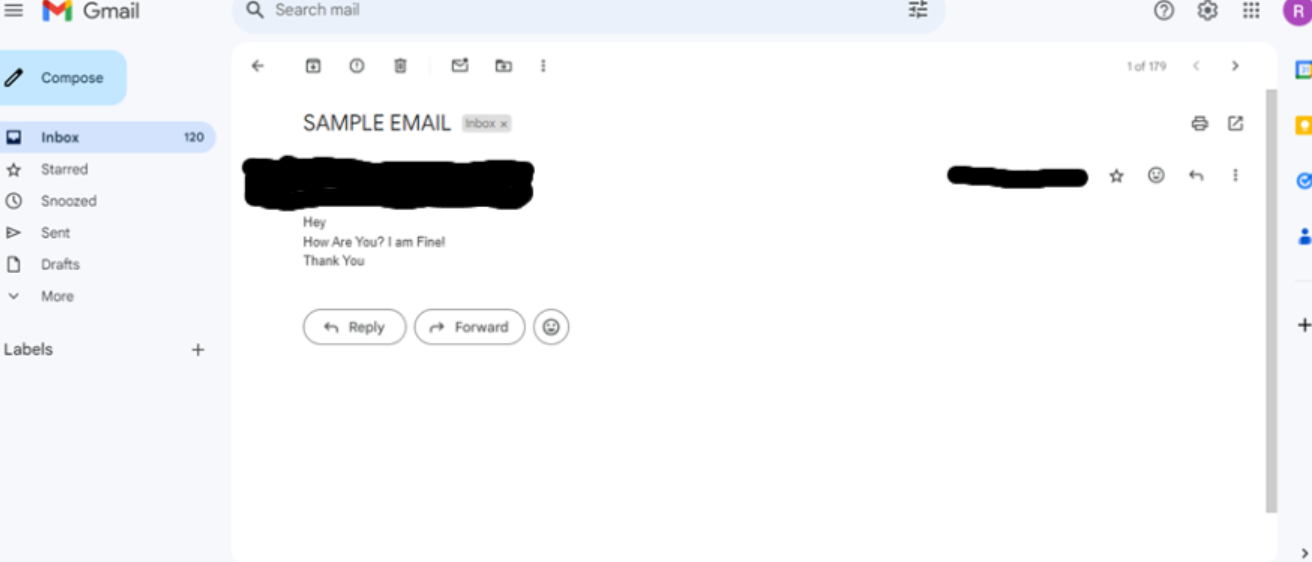
Select the email message you would like to forward from the list in the inbox. Click on it to open the entire email with all its attachments.
Step 4: Click the Forward Button

Within the opened mail, look for the “Forward” button placed either at the end or top of the mail window. This action will prepare the email for forwarding.
Step 5: Enter Recipient’s Email Address

In the “To” field, input the recipient's email address. If you send it to several people, simply list the other recipients' email addresses separated by commas.
Step 6: Add CC and BCC Recipients

If needed, include additional participants in the Cc (carbon copy) or Bcc (blind carbon copy) fields. Remember, Cc recipients can see all other recipients' email addresses, while Bcc recipients cannot.
Step 7: Add a Message
If you must add a personal message, write it above the body of the forwarded email. This ensures the recipient sees your note first.
Step 8: Manage Attachments
If the email has an attachment that you do not wish to forward, right-click on it and select ‘remove.’ To upload a new attachment, click the “Attach files” icon and choose the file from your computer.
Step 9: Send the Email
Once you are done editing the message, click the “Send” button at the bottom right of the page to forward the email to the desired recipient. Your email forwarding is now complete.
How to Set Up Automatic Forwarding?
Email forwarding in Gmail can help you manage the flow of your emails more efficiently by directly forwarding emails to another account without your interaction. This feature is especially helpful when managing several email accounts or when it is crucial to read emails immediately.
Follow these simple steps to enable auto-forward email from Gmail. Note that this method is used only on a computer.
Step 1: Open Your Gmail Inbox
Open your Gmail account on your PC. After logging in, you will be automatically redirected to your main inbox to access all your emails.
Step 2: Access Settings

Next, click on the gear icon labeled "Settings" at the top right corner of the page. This will reveal a drop-down list of options.
Step 3: Select "See all settings"
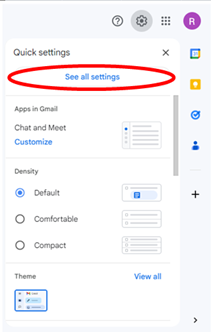
From the drop-down menu, click on “See all settings.” This will open the full Gmail settings menu, where you can customize various options for your account.
Step 4: Navigate to the Forwarding and POP/IMAP Tab
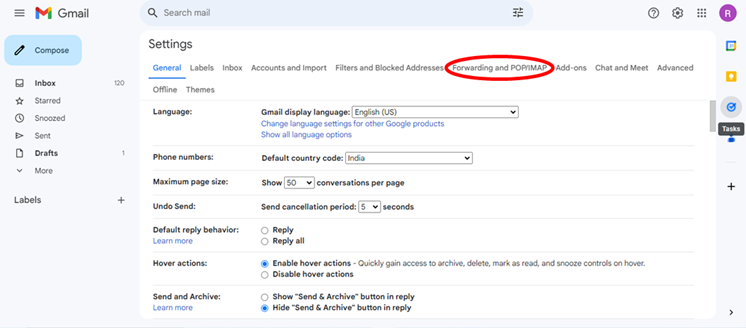
On the settings page, click on the ‘Forwarding and POP/IMAP’ tab, typically located near the center of the page. This tab contains settings related to forwarding and accessing your mail via email.
Step 5: Click "Add a Forwarding Address"
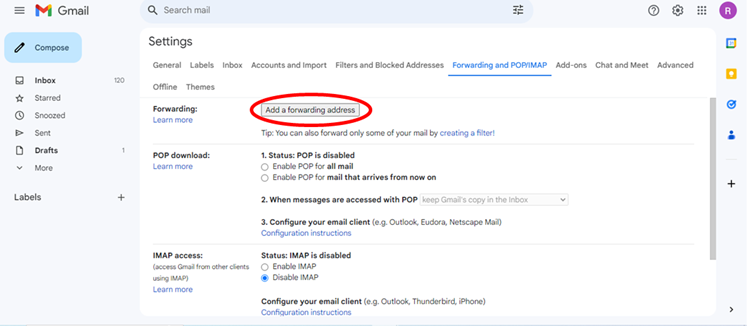
In the “Forwarding” section, click the “Add a forwarding address” button. A new window will appear, asking for the forwarding email address.
Step 6: Enter the Forwarding Email Address
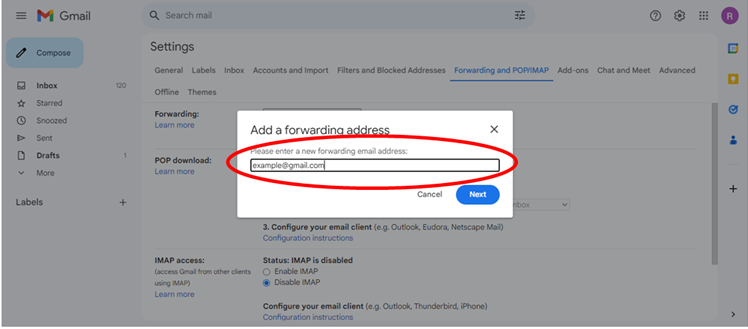
Enter the email address to which you want your emails forwarded. After typing the address, click the “Next” button.
Step 7: Confirm Forwarding Address
A new window will open, and we are asking you to confirm the forwarding address. Check the email address to ensure it is correct, then click “Proceed.”
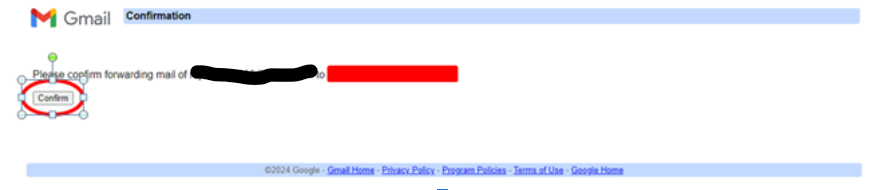
Step 8: Verify the Forwarding Address
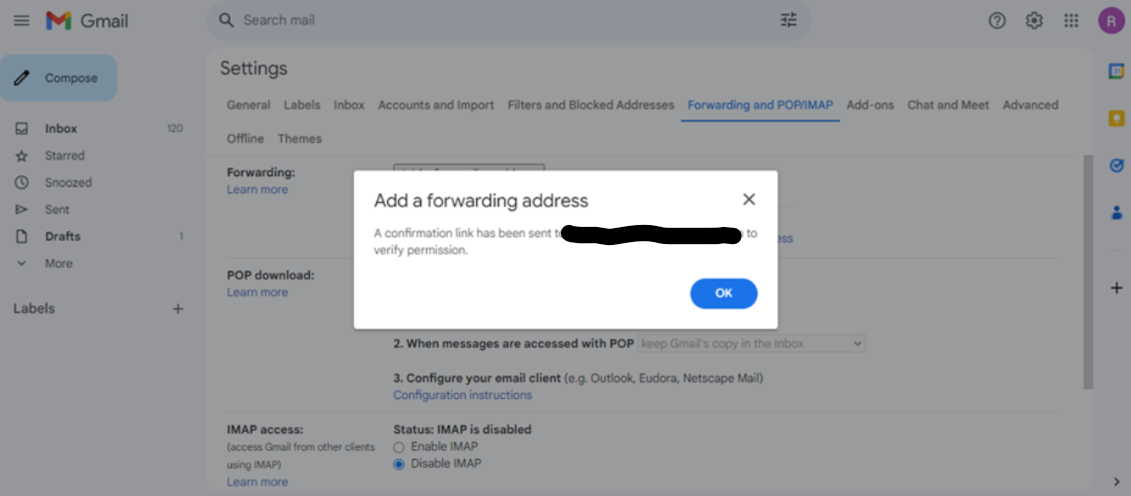
Gmail will send a verification email to the forwarding address you entered. Go to your inbox, find this verification email, and click on the verification link or enter the code as directed.
Step 9: Enable Automatic Forwarding
After verifying the new forwarding address, go back to the “Forwarding and POP/IMAP” tab in Gmail. Select the ‘Forward a copy of incoming mail to’ option and choose the verified email address from the list.
Step 10: Save Changes

After selecting the forwarding option, scroll to the bottom of the Gmail settings page and click ‘Save Changes.’ Gmail will now automatically forward all new messages to the specified email address.
How to Enable Filters to Forward Specific Emails
Using filters to forward specific emails in Gmail is a great way to manage your emails. Filters allow you to define conditions under which specific messages should be forwarded, and they can help eliminate undesired emails.
This method is more versatile than simple forwarding, as it allows forwarding to more than one mailbox and blocks unnecessary emails. Here’s how to enable filters to forward specific emails in Gmail:
Step 1: Access Gmail Settings
Enter your username and password to open your Gmail account on a computer device. Then, go to the top of the page, with the Settings gear icon. Under the dropdown menu, click on the “See all settings” option to access other settings.
Step 2: Navigate to Filters and Blocked Addresses
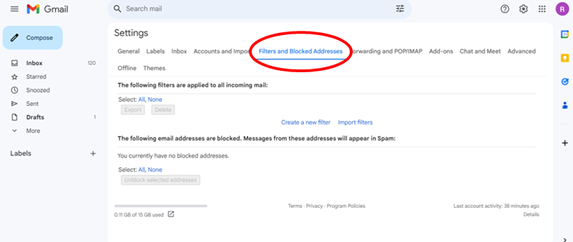
In the settings menu, click the “Filters and Blocked Addresses” tab. This section enables you to set and apply rules to your incoming messages.
Step 3: Create a New Filter

Locate the “Create a new filter” link. This will open a form where you can specify the parameters for the emails you wish to forward.
Step 4: Set Filter Criteria
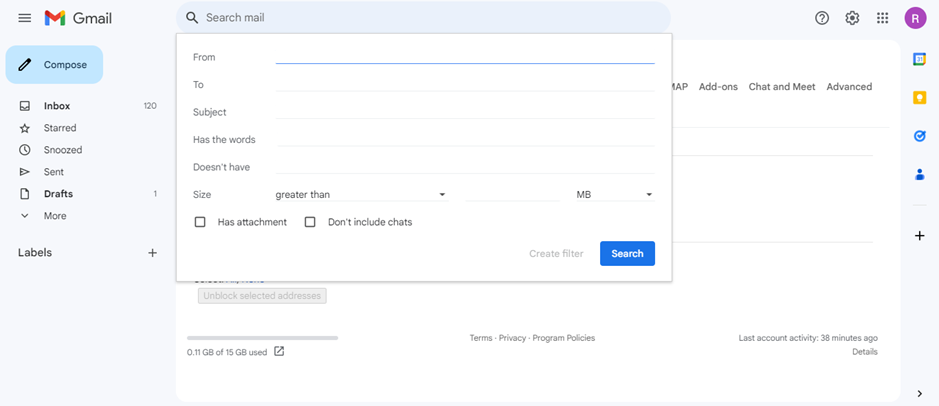
Enter the details of the criteria for the emails you want to forward. You can filter emails based on criteria such as sender, recipient, subject, keyword, and size. Once you have input the desired criteria, click on the button labeled “Create filter.”
Step 5: Show More Options
All emails that meet the specified criteria will be shown to you. You can find additional filter options below the search bar.
Step 6: Enable Forwarding

Check the box labeled “Forward it to” and select the appropriate email address from the drop-down list. If the email address is not listed, click the “Add forwarding address” button to add it.
Step 7: Finalize the Filter
Select the forwarding address and click ‘Create filter’ to set the filter. This filter will now forward all incoming emails that meet the specified criteria to the selected email address.
To forward emails to other addresses, repeat the steps to set up filters with the same conditions but different forwarding addresses. Note that filters will only work for new incoming emails; they will not apply to emails already in the inbox.
Neo: Empowering Small Businesses with Integrated Solutions
Neo is a multi-purpose platform and an email service provider designed for small businesses. It provides comprehensive solutions for business email, email newsletters, and websites with one page. Users can also synchronize their Gmail accounts directly with Neo for improved business efficiency.
Integrating Neo with Gmail: Step-by-Step Guide
Neo is a business-oriented email solution for small businesses that uses a custom web interface that is accessible across different devices. It offers enhanced capabilities, including superior backup options, greater delivery assurance, and additional built-in features like video conferencing and email management.
To link Neo Mail with Gmail:
Neo offers a very simple process to integrate your Neo email address with your Gmail. Here are the steps you need to follow:
Step 1: Disable Two-Factor Authentication
Ensure that third-party application access is enabled by disabling two-factor authentication in Neo settings.
Step 2: Access Gmail Settings:
- Log into your Gmail account.
- Click on the cog icon in the upper-right corner and select "Settings."
- Navigate to the "Accounts" tab.
Step 3: Add Your Neo Email Account:
- Next to "Check mail from other accounts," click "Add a mail account."
- Follow the on-screen instructions, allowing pop-ups if necessary, and enter your Neo email address.
Step 4: Configure POP3 Settings:
- Enter the POP3 settings provided for your Neo email domain.
- Ensure to select "Keep a copy of retrieved messages from server" to view emails in both Neo and Gmail interfaces.
Step 5: Set Up SMTP for Outgoing Mail:
- Opt to set up SMTP for sending emails through Neo via Gmail.
- Enter your sender name and ensure "Treat as an alias" is checked.
Step 6: Complete Verification:
- Gmail will send a verification code to your Neo account.
- Click the verification link or enter the code provided to finalize the setup.
Wrapping Up
One of the most beneficial uses for those utilizing Gmail is knowing how to automate the forwarding process of emails. Gmail auto-forward is very useful for both personal and business communication. Following these steps will improve productivity and make messages easily available across different platforms. To enhance your small business’s email solution, consider integrating Neo with your Gmail account right away!
Frequently Asked Questions
1. What are the benefits of setting up email forwarding in Gmail?
Email forwarding in Gmail enables users to receive emails from different accounts in a single inbox, easing the process of handling correspondence. It ensures that you do not miss critical messages and makes it easy to view all messages in one mail account.
2. Can I forward emails to multiple addresses using Gmail filters?
Yes, using Gmail filters, you can forward specific emails to multiple accounts based on filtering conditions. This feature is quite helpful for organizations that need to ensure specific messages reach various departments or groups.
3. How does Neo enhance email management beyond Gmail's features?
Neo offers more innovative features, such as video mail integration, better backup solutions, and improved delivery assurances. These features go beyond basic Gmail capabilities, providing businesses with stronger tools for communication and organization.
4. Is it possible to integrate Neo with other third-party email applications besides Gmail?
No, Neo integrates with a plethora of third-party email applications, not just Gmail. This flexibility allows organizations to manage emails across various platforms, thereby improving business efficiency.
5. What security measures does Neo employ to protect forwarded emails?
Neo understands the importance of email security and employs measures such as encryption protocols for forwarded emails and the ability to lock emails from other devices. These measures keep information secure throughout the forwarding process, preventing exposure to unauthorized parties.
Get Business Email
No domain name required